I thought I have taken so much from the blogging community, its time for some contribution.
I don't know any web designing to program my own blog, so I tried doing something with a handy tool like paint brush.
What I describe below, is just my method, and I don't claim that its the best or the correct one. In fact I am also not sure if its the easiest one, so if you have any questions, or if I don't make any sense please feel free to ask me. :)
Here’s how I have made header picture for my blog using Paint Brush.
1. Get Interesting fonts:
2. Select the picture that you want in your blog header, right click it and Open it with Paint.
3. If your picture looks like this, its probably too big, and needs to be compressed.
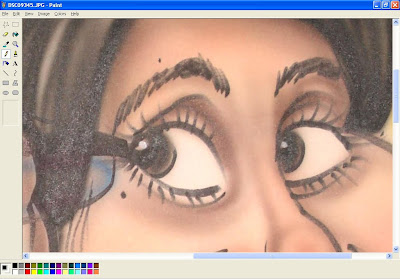
4. To compress the picture, Click on "Image"->select "Stretch\Skew".
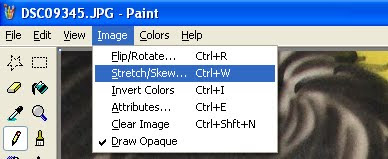
5. Input the stretch options by 50%, both horizontal and vertical.
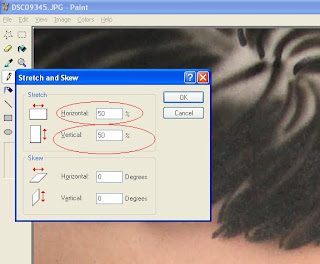 6. On hitting OK, the re sized image will be displayed, if that's too big, again click on "Image"->select "Stretch\Skew", and input the stretch options by 50%, both horizontal and vertical.
I am just taking 50% as half the size, you can input any percentage you wish. You will have to do hit & try here, just DO NOT HIT SAVE AT ANY POINT..!!
7. Do it till you achieve the desired image size, if you want to crop the image, click on select, from the left tool bar.
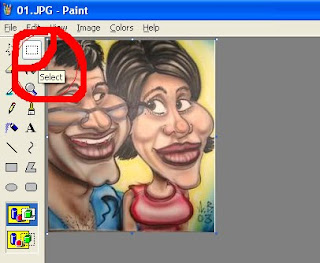 8. Now select the specific area of the image the you want, right click over it and select copy.
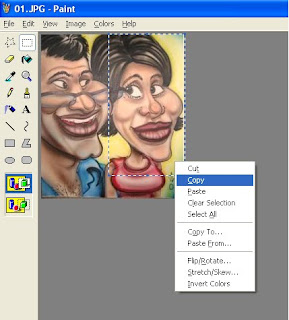
9. Now open a new blank Paint brush file, and paste this image.

10. This is how it looks like:
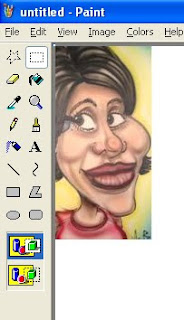
11. The size of a paint brush canvas is determined by the tiny blue dots at the end (very tiny, tough on eyes). When cursor is placed on it, it becomes a two sided arrow. Clicking on this arrow and dragging it inside reduces the size of the size of the canvas. This is what I want at this point.
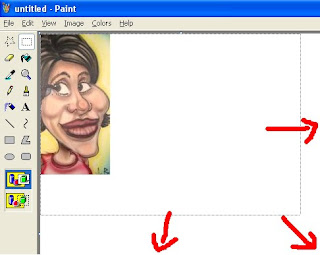
12. Finally I reduce the canvas to fit my size.
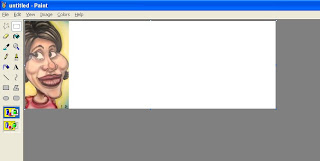
13. Click on Image and make sure "Draw Opaque" option is UNCHECKED.
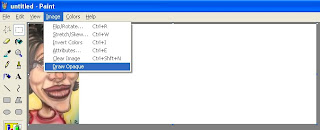 14. Click on select and, select the white area on the canvas.
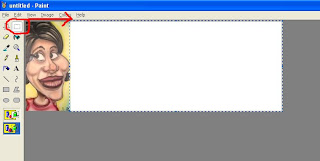
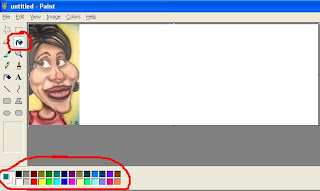
15. Now choose the option, "Fill with color", and choose a desired color.
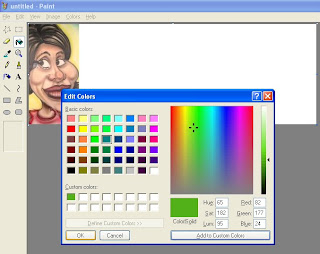
16. If you don't find a desired color, dbl click on any color and a custom color screen will pop, move the mouse around shades to get the right shade. And click "Add to custom color"
 17. Just click on the white area with Fill color option,
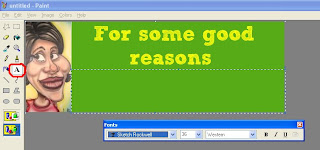
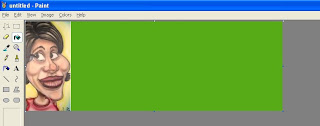 18. Select the text option.
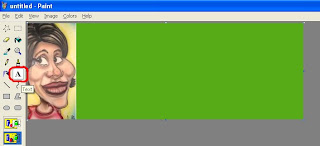 19. Select the area where you want the headline to appear.
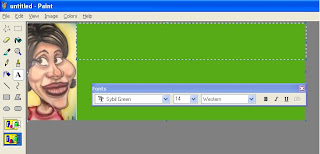 if you don't see this text tool-bar, click on View-> check the Text Toolbar option.
20. Select the desired font and font size, and type the text. You will have to align and format it according to the space available.
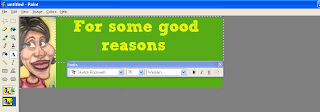
21. At a time, only one font and one font size can be used. If you want to change font/size, again select the text option and select the area where you want the headline to appear.
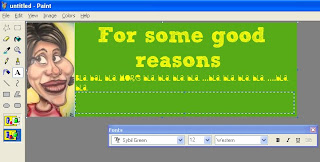
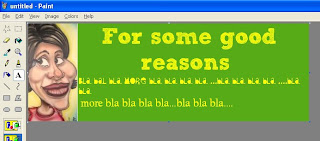
22. This is how finally my header looks like. And Save the image.
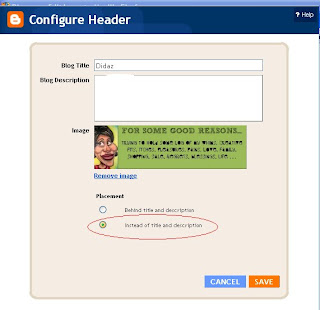
23. In your blog in the configuration header, make sure you select the choice - "instead of title and description".
24. The end...!!! Let me know if you have any questions.
ps:Also step 12 is the basic step, like I cropped 1 image , you can crop several images and drag& place on the canvas area.Or first add text and then paste images.
